This procedure shows how to access and edit the files necessary for implementing customizations in Primo VE using HTML, images, CSS, and JavaScript.
Access View Configuration
- Log in to your Alma account. You must have the Discovery Administrator role enabled to configure views for your institution.
- In the “Discovery” menu, select “Configure Views.”
 Display Configuration > Configure Views”>
 - Click on the ellipsis button next to the view you want to use. Click “Edit” in the dropdown menu.

- In the View Configuration screen, click the “Manage Customization Package” tab.
 Display Configuration > Configure Views”>
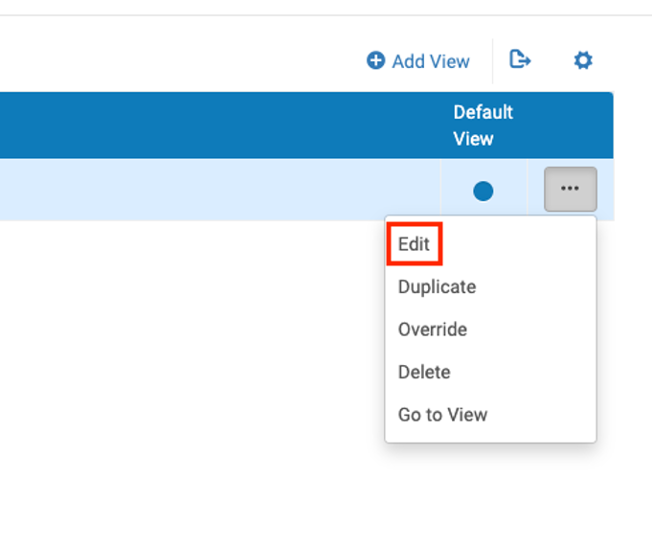
Download Your Local Package
If you have previously uploaded a package, click the “Download” button next to the label“Current View.”
If you have not previously uploaded a package, click the “Download” button next to the label “Template View.”
You can also download the Central Customization Package maintained by the PCSG to examine and use in development environments. Changes to the Central Package must be made at the Network Zone level.

Modify Your Local Package
Unzip your package with any ZIP utility.
The ZIP of a customization package must follow this structure:
- VIEW_CODE
- css
- html
- img
- js
In Primo VE, the view code uses the format <institution_code>-<view_code>. For example, if your VID in Primo URLs is 01ALLIANCE_ABC:DEF, the top-most folder in your package must be 01ALLIANCE_ABC–DEF.
See Primo VE Customization Best Practices for an explanation of the files contained in each folder. In general, style changes will be made in css/custom1.css, and AngularJS changes in js/custom.js (including enabling modules from the Central Package).
Prepare Your ZIP
After making changes, zip up your local package.
Windows
For Windows users, ExLibris recommends using the program 7Zip (http://www.7-zip.org/).
macOS
For Mac users, the PCSG recommends using Terminal with the following procedure:
- (If the folder is on your desktop) Open Terminal
- Enter the command:
cd Desktop - Enter the command:
zip -r foo.zip foo -x "*.DS_Store"(where foo is the folder to zip)
A drag-and-drop alternative is the free app Keka. To use it, drag the customization folder from your Finder window to the Keka window, and make sure the option “Exclude Mac resource forks” is checked.

Upload Your Local Package
To upload the package:
- Go back to the “View Configuration” screen.
- Click the “Manage Customization Package” tab.
- In the “Upload Package” section, click on the folder icon to find the zipped package in your directory. Open it and click “Upload”.
- An alert on the upper right-hand side of the screen will confirm the upload or indicate errors in the package that need to be resolved.
- Click the “Save” button near the top of the page to deploy the changes.