This procedure provides guidance on identifying boundwith records in Alma.
Background/Context
If you can create a set of records in Alma, you can use the combine sets functionality to make sure those records are not included in another set of records. In our current efforts to clean up bib records in Alma that don’t have inventory attached, we need to be able to create sets of bib records and make sure those sets do not include records that are part of a boundwith relationship. These instructions show one method of creating a set of boudwith records so they can be excluded from other sets.
The boundwith record structure in Alma uses a ‘host’ bibliographic record (the bib record with the holding and item record attached) which contains 774 fields that point to the bib records for the titles that are contained in the boundwith item. Alma uses the MMS IDs that are stored in the $w subfield of the 774 fields to create the virtual links in Primo that link the title bibs to the inventory (i.e., the host item). Here are example fields taken from a host bibliographic record in Alma:
001 9983196820001453
245 00 |a Host bibliographic record for boundwith item barcode i1857042
774 1_ |t Methods of estimating recharge to the Floridan aquifer in northeast Florida / by G.G. Phelps ; prepared in cooperation with city of Jacksonville, Florida |w 9984636650001453
774 1_ |t Water-Resources investigations / U.S. Geological Survey. |w 9982433750001453
The record above points to two bib records, each describing one of the titles included in this boundwith relationship.
Search Strategy:
The first step in creating a set of all a library’s boundwith records is to create a set of bib records that contain MMS IDs in 774 fields. This search will return all bib records that include a “99” in any value in the “Other System Number” index. This includes 774 $w with MMS IDs, but it also includes any other “Other System Number” values, such as 035 fields, that contain “99”.
Note: An alternate search strategy, to just create a set of all bib records that contain “Host bibliographic record” is not effective, as Alma doesn’t require that host bibliographic records contain that string. The title in the host bibliographic record can be changed, and Alma also allows direct linking between a title bib record in a boundwith, and other title bib records in the boundwith, without using a separate host bibliographic record.
Since our original boundwith set will contain records we don’t need, the bib records in the set are exported and MarcEdit is used to extract those records with MMS IDs in 774 $w fields from the other, undesired bib records. Next, MarcEdit is used to extract the MMS IDs from the 774 $w and 001 fields, so that both the host bibliographic records and the linked title records will be included in the final set of boundwiths.
Although we now have a file that contains the MMS IDs of all the records associated with the boundwiths, the file is not in the format needed to use in Alma to create a set. Therefore, MS Word and Excel are used to reformat the file (into a file with a single column of all the MMS IDs) and to get rid of any duplicate MMS IDs.
Finally, a set of all the records associated with boundwiths will be created in Alma based on the file of MMS IDs created above.
Step 1
Create a set of bib records that might be boundwith records, either the host bibliographic records or the records that the host bib records link to.
Host bibliographic records don’t have to use the default 245 field “Host bibliographic record for boundwith item barcode . . .” Alma allows a bib record for a title in a boundwith volume to be directly linked to other title bib records in that volume. Additionally, the records that a host bib record links to have no indication that they are part of a boundwith relationship. The key is that the host bibliographic records contain the MMS ID for each linked record in individual 774 $w subfields. So the first step is to find all records in Alma that contain a 774 $w subfield. Not easy to do, since Alma does not allow searching for specific fields or subfields. So this is one workaround.
Alma online help shows that the 774 $w subfield is included in the All Titles Other System Number index. Create an All Titles set where All titles (Other System Number contains exact phrase starting with “99”). Save the resulting set with a distinctive name (e.g., “Boundwiths Step 1”).

Step 2
Export the set of bib records created in step 1.
Go to Run A Job and use the Export Bibliographic Records job. Run it against the set you created in step 1, using Physical format = Binary.
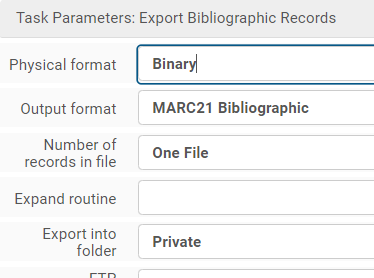
When the job has been completed, go to Monitor Jobs > Job History, and on the line for your export job, select Actions > Report. The report will have a hyperlink with a file name something like “BIBLIOGRAPHIC_8987926080001453_1.mrc”. Click on the file name link and on the next screen select Actions > Download and save the file of bib records on your computer.
Step 3
Extract the bib records that contain 774 $w subfields from the file downloaded in step 2.
Open MarcEdit and select Tools (along the top row) -> Select MARC Records -> Extract Selected Records. Change Display Field to “774$w”, click on the folder for the Source MARC File and select the file downloaded in step 2, and click the Import File button.
Next, click on the “Display Field (774$w)” column heading to sort the records by the values in the 774 $w subfield. Check the Retain Checked Items box, click the top line with a value in 774$w (not the ones that start with (CKB)), hold down the shift key and click the last line with a value in 774$w. If clicking on the line doesn’t check the appropriate boxes, click on one of the boxes (while the lines are still highlighted), and all the lines should be checked. Check to make sure all lines with a value in 774$w (other than CKB) are now checked.
Next, you need to create a file of the records with a value in the 774$w subfield. To do this, click the Export Selected button and tell MarcEdit where to put the file.
Finally, you need the convert the MarcEdit ‘.mrk’ file to a ‘.mrc’ MARC file. Go to MARC Tools (the big icon – not the top row), choose MarcMaker, select the file you just created as the input file (it will have a ‘.mrk’ extension), select the output file, and allow MarcEdit to fill in the output file name. Then click on the Execute button.
Step 4
Extract the MMS IDs from the 001 fields and 774 $w subfields in the file of records created in step 3.
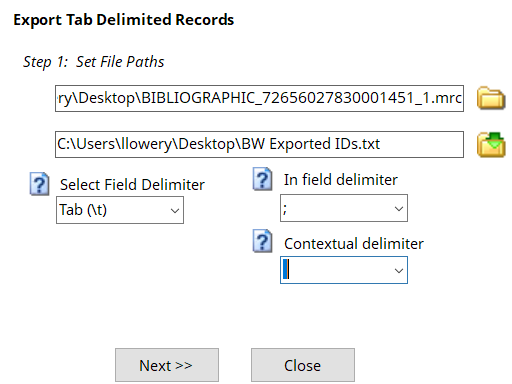
In MarcEdit, select Tools (on the top row) -> Export -> Export Tab Delimited Records. For the top file name box, click on the folder and select the ‘.mrc’ file you created in step 3. Then click on the folder next to the second file name box and provide a file name for the ‘.txt’ file that will be created as part of this process. Leave the default values for the “Select Field Delimiter” and the “In field delimiter” fields and click on the Next button.
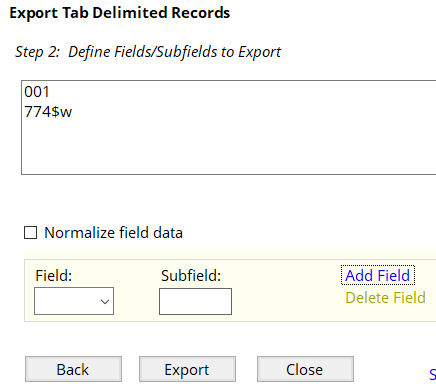
Enter “001” (without quotes) in the Field box and click the Add Field link. Next, enter “774” in the Field box and “w” in the Subfield box, then click the Add Field link. Finally, click the Export button.
Step 5
Reformat the file of MMS IDs created in step 4.
Open the file of MMS IDs created in step 4 in MS Word or Notepad++. Replace quotes (“) with nothing (remove all quotes) and click the Replace All button. Replace tab characters (^t or \t) with a carriage return or newline (^p or \n) and click the Replace All button. Replace semicolons with a carriage return or newline (^p or \n) and click the Replace All button.
Finally, replace the top lines (001 and 774$w) with a single line that contains only “MMS ID” (without the quotes). Save the file and close your text editor.
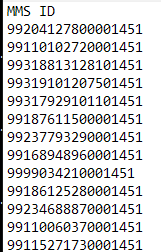
Open the ‘.txt’ file from the previous step in Excel. When opening the ‘.txt’ file in Excel, in step 3 of the Text Import Wizard, change the Column data format selection from “General” to “Text” (this prevents Excel from displaying long numeric values like MMS IDs in scientific notation). Next, select the entire spreadsheet and use Data > Sort to sort by the MMS IDs. Next, use Data > Remove Duplicates to retain only unique MMS IDs. Save the file.
Step 6
Create sets of bib records in Alma based on the file(s) of MMS IDs.
In Alma, go to Manage Sets and click on the ‘Add Set button’ and click the ‘Itemized’ option. Name the set and set content type = All Titles. Browse for your file of MMS IDs (or your first file) and click the ‘Save’ button.
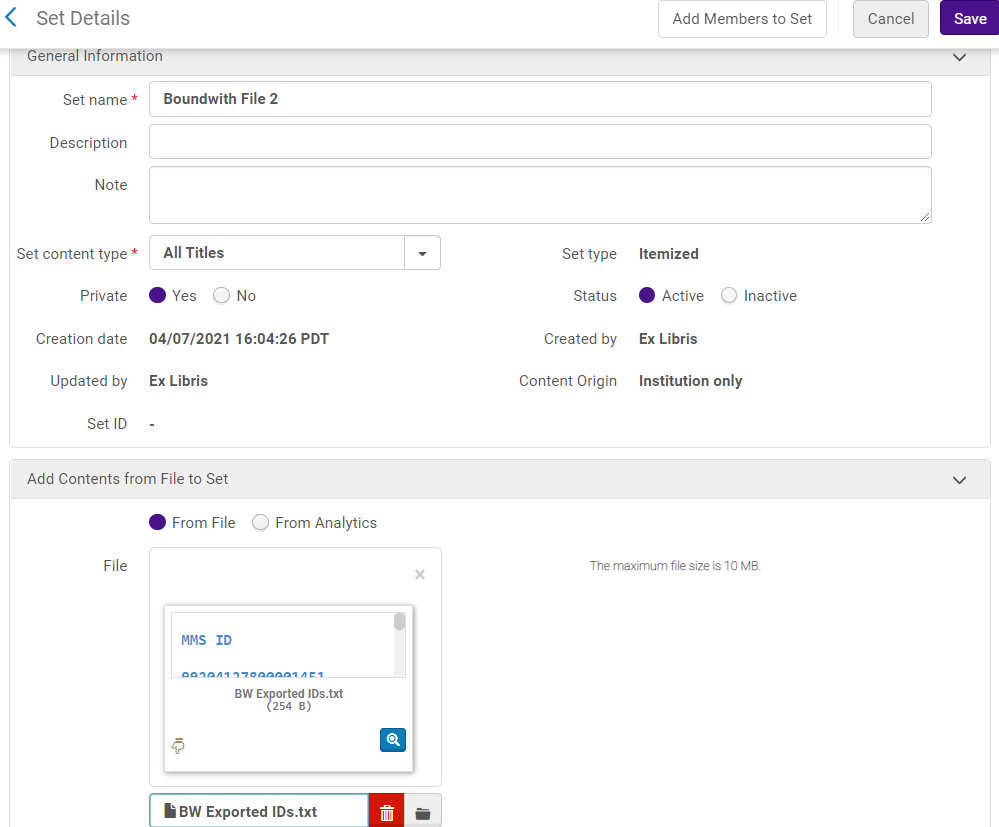
If your file of MMS IDs is larger than 10 MB, you have to split the file into multiple input files, as when creating sets based on an input file, Alma can only accept files of 10 MB or smaller. Repeat the above process for each file, giving each set a different name.
If you had multiple files of MMS IDs, you then must combine all of the sets into a single set. To so do, go to Manage Sets, and for your first file, select Actions > Combine sets. Modify the resulting merged file name, if desired (e.g., “Boundwiths File 1-2”). Then change the Operation to “Or”, click on the With box, and select your second file of MMS IDs from the provided list. (Note that if you have many sets, the provided search box can help you identify it more quickly.), Finally, click the Select button, then the Submit button. Repeat this process, adding each additional set, until all your sets have been combined into one large set (e.g., “All Boundwiths”).
Step 7 (optional)
Add a bib record marker for your boundwiths.
The set created in step 7 should be a set containing all your boundwith records – both the host bibliographic records and the linked/related records. However, the set is an itemized set, so any boundwith records created in the future will not automatically be added to this set. To make future maintenance easier, consider adding a marker to each bib record in the set of boundwith records.
Select a local 9XX field to use for a marker (965 has been defined by the Alliance as an appropriate field to use for any load or maintenance markers).
In the Metadata Editor, create a normalization rule to add a boundwith marker using that 9XX field. For example:
rule “Add Local Field”
when
(not exists “965.a.boundwiths”)
then
addField “965.a.boundwiths.”
addSubField “965.9.LOCAL” if (not exists “965.9.LOCAL”)
end
If you haven’t already, create a job to run the normalization rule. Go to Alma > Resource Configuration > General > Processes, click the Add Process button, set Business Entity = Bibliographic title, and Type = Marc 21 Bib normalization. Click the Next button, add a name and description, click the Next button, check MarcDroolNormalization and click the Add to Selection button. Finally, click the Next button, set the Drools File Key = [your normalization rule], and click the Save button.
Run your normalization rule. Go to Alma > Run a Job, and check the job that runs your normalization rule. Then click the Next button, select your set of boundwiths, click Next (3x), and then Submit.
Checking for broken boundwith links.
A simple way to check for boundwith links is to do the following:
For each set created in Step 6 above, go to the Members of the set and click on the Export List button.
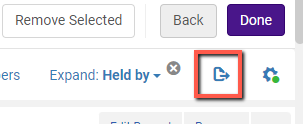
It takes Alma quite a few minutes to create the spreadsheet, so don’t do this step when you’re in a hurry.
In the resulting Excel spreadsheet, a blank cell in the “Availability of related records” column indicates a problem with a link (not necessarily a broken link).

Background
Software: Alma
Current phase: NA
Written by: Bob Thomas; Lesley Lowery
Approved by: NA
Last updated: 9/9/2021
Nature of last update: revised to reflect current functionality, updated screenshots
Document History: First draft written on 2/19/2015 by Bob Thomas.
